A UK Beauty, Lifestyle & Parenting Blog

Friday 30 May 2014

DIY French Manicure | How I Do It

DIY French Manicure Tutorial

Don't you just love how clean and fresh a French Manicure can make your hands look? There's no need to pay salon prices when it's so simple and easy to do at home. There are quite a few different ways to do an at-home French Mani, like using tape or stencils for instance, but I want to show you the way I like to do it. It involves no awkward cutting/drawing - just a steady hand.

Tools You Need
Nail File
Pure Acetone
A Dish (or you could just use the cap of the acetone
An eyeshadow brush or paint brush
Base Coat
White Nail Polish
Sheer Pink French Manicure Polish
Top Coat

DIY French Manicure Tools

1. Start with clean, bare, filed nails.
2. Add your basecoat of choice. I like to use Revlon's Quick Dry Base Coat. It's the best I've tried so far.

DIY French Manicure Tutorial

3. Take your white polish and paint over the tips a little bit bigger than how you would like them. It doesn't matter how messy you are with this as it's gonna be tidied up soon. I use Barry M Nail Paint in Matt White, but any white polish will do. Add another coat for opacity and allow to dry.
4. Add a small amount of pure acetone into a little dish (or the cap itself). Dip the eyeshadow brush or paint brush into the acetone and neaten up the tips to the shape you like them. I find pure acetone works much easier (& quicker) than regular nail polish. I use a mixture of pushing (towards the tip of the nail) and sweeping motions in order to get the shape I like.
5. Repeat all steps to each nail until you are happy with the tips.
6. Add a coat of sheer pink manicure polish. I'm using the Miss Sporty Et Voila French Manicure Polish. It's cheap and cheerful, and leaves a lovely shine without making the tips look pink.
7.. Add your favourite topcoat and you're good to go! I adore Seche Vite Dry Fast Top Coat, and I can't imagine using anything else now!

DIY French Manicure Tutorial

VOILA! There you have it! It takes time and patience, but I love the results.
How do you do yours?

SHARE:

Wednesday 28 May 2014

Nails: Think Pink!

Pink Nail Polishes. Think Pink

Pink Nail Polishes. Think Pink

Let's be honest, everyone loves a pink nail. Especially for Summer. I've picked out my 4 current favourite pink nail polishes, all of which are very different, so there's one for everyone here I'm sure. First up is your typical hot pink that looks so vibrant on the nail. Mavala's Vegas Pink, a colour cream formula, applies beautifully and leaves a super shiny finish. Gotta love hot pink. Next is a fairly new addition of mine that I've been absolutely loving. Essie's Cute as a Button is more of a coral pink with a slight orange tint that is super vibrant but not too harsh and in your face. Both Essie's brushes and formulas are top notch in my opinion and I think they are pretty hard to beat in terms of staying power. Next up is an ever so popular Barry M Gelly Nail Paint from the Spring 2013 collection. Barry M's Dragon Fruit is an an almost bubblegum pink with slight shimmer that only shows up very slightly. I think this is a really stunning shade that will suit the majority of skin tones. Great for if you want your pink to be a little bit brighter. Last but not least is the a polish I think I've mentioned quite a few times before. Rimmel 60 Seconds in Rose Libertine is for me, the perfect pink. Its a muted version of the Essie polish, but it's one of those where I find myself gazing at my nails lovingly throughout the day. It looks absolutely stunning with a tan, and the thick brush makes application a dream.

Pink Nail Polishes. Think Pink

Cute as a Button looks a lot more orange on the swatch above, which is very strange as it doesn't come across like that in real life. Darn technology! lol
What are your favourite pink polishes?

SHARE:

Sunday 25 May 2014

My Hair History & Current Haircare Routine

Just wanna bore you all with a little history of my hair...

When I was younger I had white blonde, wavy hair that was always forced up into bunches by my Mam, lol. However, like a lot of blonde kids, I reached 14 or 15 and it started becoming a lot darker into a sort of mousey blondey/brown and I longed for my bright blonde hair back. I started getting highlights every now and again and I wish I'd just left it, as I've been colouring it ever since. I'm constantly changing my hairstyle/colour as I get bored quite easily. I think I've had every hairstyle under the sun. Remember the Victoria Beckham angled bob? Back in 2007 I went from super long, luscious locks to the 'Victoria Beckham' and I kept it like that for a couple of years, just colouring it myself and I loved it. 

But then things went wrong for my trademark blonde bob. I had a bad disaster when I went to the hairdressers one day to ask for my usual short bob but with a full fringe instead as I fancied something different..... I ended up looking like a 10 year old boy as they cut the bob WAY too short with the smallest layers I've ever seen! My hubby (then boyfriend) absolutely hated it and I've never had it cut into a bob since. It took me absolutely AGES to grow it out and in terms of condition it's really never been the same since. I've been trying lots of different styles over the past few years, as I honestly think trying to grow your hair has got to be one of the hardest things ever! I find the in between part the worst, which is why I end up getting bored and cutting it again! I had micro ring extensions for my wedding and yanked them out the next day as I hated the feeling and they hurt! Didn't fancy that on my honeymoon haha! In terms of colour, I've been blonde most of the time, but I've had a couple of spells of a light/medium brown just to give my hair a rest, including when I was pregnant as I don't think you're supposed to bleach your hair and I didn't wanna risk it!

My poor hair really has taken some hammer...
My Hair History
Anyway, my hair is now sitting just about shoulder level (pic third from the left on the bottom row is most recent) and I think I'm gonna try again to grow it. In terms of colour, I'm blonde, but I recently got the root stretch technique done at the hairdressers as I wanted something low maintenance and that's what they talked me into getting. I'm not too sure how I feel about it yet as I like to be all blonde so who knows what I ask for next time! Yes I know I'm a nightmare! Right, onto my haircare routine...


My Current Haircare Routine

My Current Haircare Routine

Much to my annoyance, my hair gets greasy really quickly and I have to wash it every other day, and use dry shampoo on the day in between to spruce it up a bit. I have 2 seperate routines that I rotate just to keep things healthy and my blonde looking bright.

Routine 1: Basic Shampoo and Condition
For this, I tend to get something different each time I run out as I always like to try something new and there's always offers on haircare in Boots and Superdrug. At the moment I'm absolutely loving the Garnier Ultimate Blends The Silky Smoother Shampoo and Conditioner. They contain vanilla milk and papaya and smell absolutely amazing. They are aimed at repairing mid-long length hair with split ends, and as my ends are blonde and slightly dry, it works perfectly. I really love the results these give when used together. My hair feels really manageable and smooth.

Routine 2: Silver Shampoo and a More Intense Condition & Mask
I like to keep my blonde looking ashy and vibrant as I've had far too many episodes of the brassy yellow locks and it's not good. I recently bought the BLEACH London Silver Shampoo after reading numerous good reviews and I'm really glad I did. Each time I use it I notice my hair is looking much brighter. To my surprise, it lathers up really well and feels much more moisturising than other silver shampoos I've tried. Following this, I like to use a more luxurious conditioner, and for that I have been using the A'kin Macadamia & Wheat Protein Treatment Conditionerfor dry/damaged hair. A'kin haircare is fairly new to me, but they came highly recommended in the Natural Health Magazine Beauty Awards 2013, so they might just be ones to look out for. The conditioner itself aims to transform dry, damaged and tangled hair and restore it to it's natural shine whilst still being gentle on the scalp. I love how this makes the ends of my hair feel, and I'm safe in the knowledge that it's all natural and pure. If my hair is feeling particularly dry, or even if I'm just having a good old pamper session, I like to go in with a hair mask. At the moment the mask I use is the L'Oreal Hair Expertise Ever Riche Nourishing Intense Mask. The Ever Riche range is raved about and I really love this mask. It leaves my hair feeling super soft and smells incredible.

Drying & Styling
When I let my hair dry naturally it's a wavy mess with flat roots and it's really not a good look. Despite this, I still like to let it dry naturally now and again as it's just better for it. However, when I know I'm going to be going somewhere I tend to blow dry it with my Mark Hill Style & Shine Black and White Hairdryer and use my GHD's to style. For heat protection, I use the Tresemmé Heat Defence Styling Spray while hair is still damp. I then use the Argan Magic Intensive Hair Oil, which I absolute adore! It's non greasy formula reduces blow drying time, detangles and leaves my hair so hydrated and soft. Once blow dried, but before straightening, I use the L'Oreal Elvive Extraordinary Oil Mist and focus it just on the very ends of my hair. I like the mist as it's perfect for using on my fine hair when it's dry. It looks greasy to begin with, but my hair soon drinks it up and it doesn't leave behind any residue. I will almost always use the L'Oreal Studio Line #TXT Volume Supersizing Spray to add extra texture and volume and then I'm pretty much good to go!... until 48 hours later when I have to do it all again! DAYYYM! haha. For the days in between I use pretty much any dry shampoo I get my hands on, and at the moment it's the Batiste Dry Shampoo in Blush as it was half price in Superdrug!

Sorry for the absolutely mahooooosive post. But I love reading other people's hair stories so thought it was about time I wrote my own.

I'd love any recommendations of other products to try as I'm always looking for new hair friends! ha

SHARE:

Friday 23 May 2014

Skincare Wishlist #1

I'm constantly changing my skincare routine as there are so many things I want to get round to trying, and as my skin is quite sensitive it often decides to freak out (at the moment, for instance, it's decided that it doesn't like one of the products I'm using and is behaving quite naughtily with dry patches and a few cheeky blemishes). So I think I'm going to have to switch things up a bit to see which is the culprit. This got me browsing the web for skincare, and thus created a wishlist. Hey ho.

Skincare Wishlist #1


Give me recommendations!! ha!


SHARE:

Wednesday 21 May 2014

My Highstreet Foundations: Bourjois, Revlon & Rimmel

Highstreet Foundations

Soo I've built up a little collection of highstreet foundations in the search for the perfect base. Out of the current 7 I own, I have a few that I absolutely LOVE, and a few I really didn't get away with. (I'm aware that the shades differ slightly (ok there are a few that are far too dark for me), but it's always nice to have a selection for when you're wearing false tan / different seasons etc lol). Anyway, I'll go through them in order of the photo...

Note: I have normal to dry / sensitive skin and I almost always use a brush to apply my foundation, as that's just the way I prefer to do it. Each to their own and all that.

Bourjois Healthy Mix Serum
They sayIts fresh and instant blending gel texture blends and glides onto the skin for an even, natural finish with no mask effect. Imperfections are erased, signs of fatigue are smoothed and the skin’s radiance is boosted for up to 16 hours.
Ahhhh. A much loved foundation of mine that used to be my favourite, until one of the others from this lineup took it's place ;-) cheeky tease there, lol. This foundation has been raved about in the blogging world, and for good reason. It's the gel version of the original Healthy Mix, which is apparently more of a matte finish than the serum. It's a light/medium coverage foundation that is really hydrating and gives the skin that healthy glow. The lasting power is average, but by the end of the day I'm usually just at home doing tea etc anyway so I don't really care. I'd urge you all to try one of the healthy mix foundations as they have a really good reputation.

Bourjois Happy Light
They say: Velvety formula for a luminous, undetectable and natural finish.
This is a true 'liquid' foundation that is slightly on the watery side. I'd say the finish is of the satin variety. It sits right in between dewy and matte, which looks super natural on the skin and really does leave it looking flawless. The coverage is light/medium and looks great when buffed into the skin using my Real Techniques Buffing Brush. I'd say one pump should be easily enough to cover the face, and anything more may just become a struggle to blend.

Revlon Nearly Naked
They say: Blends seamlessly, creates a fresh, even look and covers flaws.
Another very liquid formula, slightly more watery than the above. I really wish I hadn't been rushing through Boots when I grabbed this, as it's far too orange on my skin, so I haven't got the wear out of it that I've wanted to. I'm thinking about getting a shade lighter than my skin and mixing it. Anyway, I do love the finish this foundation gives. Again, light/medium coverage that's buildable if you need it to be. This gives a much loved (by me) dewy finish without looking shiny. I think this sits a lot better on the skin than the Happy Light, as I find that takes a bit more work to blend in. One thing that annoys me with this.. NO BLOODY PUMP! Whyyy Revlon? I'm always a nervous wreck when I'm trying to pour a little of it onto the back of my hand!

Revlon Photoready (liquid)
They say: Contains photochromatic pigments that bend, reflect and diffuse light.
Hmm, this is one of the foundations that my skin just really doesn't get on with. It's a medium coverage that can be buildable to a fuller coverage. It's a litte bit thicker/creamier than the others, so a little goes a long way with this. With this being an oil free foundation, it's actually designed for those with more oilier complexions. So I'm not exactly saying it's a bad foundation, but it's just totally wrong for my dry skin. I find it struggles to blend and ends up clinging to dry patches and just looking cakey around my nose. It's one of the more expensive high street foundations aswell so I'm gutted as I really wanted to love this.

Rimmel Match Perfection
They Say: Traceless coverage with Advanced Smart-Tone Technology reveals a perfectly flawless you, no matter what the light.
Again, this is a typical liquid foundation. A perfect consistency in my opinion. But I may be biased as this is my absolute favourite highstreet foundation that overtook the Healthy Mix Serum and claimed the top spot! What I love about this foundation is the way it blends seamlessly into the skin, leaving behind no streaks and no harsh lines. You might be able to tell by now that I love a light/medium coverage foundation that adds a nice dewy finish to the skin. This foundation does just that. It smells lovely and fruity too. Without a primer it doesn't show it's true potential, but on top of a primer this is my perfect foundation that lasts a good 7-8 hours with powder.

Rimmel Lasting Finish 25hrs
They sayGiving a smooth lightweight coverage that leaves skin feeling hydrated all day.
On my skin, this foundation is a let down I'm afraid. It definitely does not leave my skin feeling hydrated, and in fact does the exact opposite. It clings to dry patches, settles into lines and leaves an overall cakey look to my skin. And while I'm on one - I don't know why companies feel the need to claim that foundations can last 25 hours, because a.) that's absolute tosh, and b.) who needs their foundation to last that long anyway? -"oooh I must have flawless skin whilst I'm in bed.. asleep!". Anyway, this foundation is pretty similar in consistency to the Revlon Photoready, which is probably why it doesn't work for me.  It's a light/medium coverage that leaves much more of a matte finish than I'm used to. Can't like them all can we!

Rimmel Wake Me Up
They sayA light, smooth texture for natural, 100% poreless coverage instantly eliminates signs of tiredness and lifts skin from fatigue. Radiance pearls illuminate for a healthy, radiant glow. 
This is another foundation that I absolutely LOVE. More so in the summer time, as it contains light-reflecting shimmer particles that may make you look a bit too much like Edward Cullen in the winter sun. It's probably one of the thicker consistencies of the bunch, but once applied to the skin it leaves a wonderful glow. I find this to be super moisturising and glides over the skin like an absolute dream. It's a light/medium coverage, but I do find I need to apply a little bit more than the others to cover the whole face. Not sure why? All in all, a lovely foundation, but if you HATE those tiny shimmer particles, then steer clear.

Hope this post was helpful if, like me you love a dewy, natural looking, affordable foundation.
What do you think of these foundations?

SHARE:

Friday 16 May 2014

eBay Wishlist #2

Nothing much to say except.. I couldn't resist scouring the wonderful world of ebay for a few spring/summer fashion pieces!

eBay Wishlist #2 May 2014


What are you wishing for on eBay??

SHARE:

Wednesday 14 May 2014

The Brand: Boots Botanics

Boots Botanics Range

Have you ever gone through your skincare/makeup stash and realised you own a huge amount of products from the same brand? It must mean something when you choose to try more and more of the same brand's products. I've become a firm fan of the Botanics range from Boots over the last few months so I thought I'd talk you through the products I've tried so far.

First up is the first product I ever tried from Botanics, their All Bright Soothing Eye Makeup Remover. What I really like about this is the fact it's separated into two layers (an oily layer and a water layer), that you have to shake to activate. The oil provides the make-up removing ingredients, while the water aims to soothe and condition the eye area. This does a great job at removing all eye make-up before cleansing. Next up is my absolute favourite cleanser ever. I've mentioned the Hot Cloth Cleansing Balm and my love for it countless times on my blog. I'm onto my 3rd tub of this stuff and I don't see why I would want to try any other way more expensive cleansing balms (Emma Hardie, I'm looking at you), when this one just agrees with my skin so well! After cleansing is of course, toning. The Botanics All Bright Cleansing Toner is suitable for all skin types and is great for that next step after cleansing to remove any remaining impurites and brighten the skin. After toning I now always use a facial oil and swear by them after finding out my skin was dehydrated. After turning to facial oils I can honestly say my skin has never been better. The Botanics 100% Organic Facial Oil is the most recent facial oil I've tried and it really keeps my skin well moisturised and keeps any dry patches (especially around my nose) at bay! Containing nourishing rosehip, this oil is proven to lock in moisture for 8hours, while softening and restoring the skin to it's natural glow. I absolutely adore this product (like the other facial oils I've tried), but the one thing I don't like about this oil in particular is the smell. I thought I'd get used to it but I haven't yet. But hey, when it makes my makeup glide on like a dream, I really can't complain too much. Last but not least, is the newest addition to my Botanics stash, the All Bright Hydrating Day Cream. This is a lovely, light cream aimed at normal/dry skin that sinks into the skin (after using the oil, of course), and leaves my face looking much more awake and all round well looked after. Botanics offer quite a few different day creams for different skin types etc, so have a good look at them all first if you're considering this brand.

Can you tell I'm a huge fan of Botanics? I honestly can't fault them as a brand from what I've tried. They're really affordable and are pretty much always on offer. Also, Boots usually send out Advantage Card vouchers through the post that often feature some sort of Botanics offer to give extra points or whatever.

GET YOURSELVES TO BOOTS! I dare ya!

SHARE:

Sunday 11 May 2014

Fuse Gelnamel Starter Kit by Sensationail (in Vamp)

Fuse Gelnamel Starter Kit Review

Fuse Gelnamel Starter Kit Review

Fuse Gelnamel Starter Kit Review
Fuse Gelnamel Vamp Starter Kit* £35.00

So, where do I start? I've always loved the idea of gel nails and I've had a couple of great gel manicures, but I'm one of those people who gets bored of the same nail colour and wants to change it up more often than every 2 weeks (not to mention the hefty price tag that comes with regular gel manicures), but at the same time I've always craved chip free nails that keep their shine. So when I got the press release through for Sensationail's newest product I was super excited to give it a go.

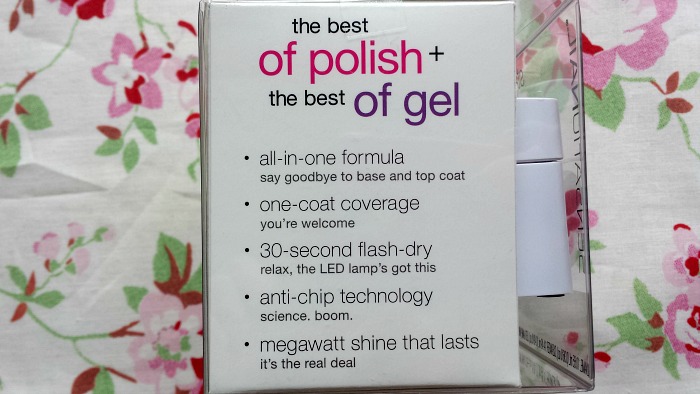
Fuse Gelnamel is a gel-polish hybrid which is the world's first of it's kind, offering; around 7 days lasting power, anti chip technology and long lasting shine, with the added bonus of giving everything you need to get a speedy salon-style manicure at home. As you can see from the photo above, the Fuse Gelnamel Starter Kit* houses everything you need, including an awesome little LED lamp, which cures one nail at a time in 30 seconds. The lamp also flips out so that you can use it on your toes too! The kit is compact and perfect for travelling, with a handy USB power cable, so you can even power the lamp from your laptop!  I'm not gonna lie, there are parts about this kit that I absolutely love (the adorable lamp being one of them), but there are other parts that annoyed me a little bit. 

Inside the kit is a little booklet, which gives you a simple step by step guide to each part of the nail. They stress the importance of doing all 3 steps to one nail at a time.

Step 1: Push back cuticles. Buff entire nail. Apply cleanser to lint-free wipe and thoroughly wipe nail clean.

Step 2: Wipe excess Gelnamel off brush on bottle neck. Apply one very think coat to nail, avoiding cuticle area. Lightly cap the tip of the nail with Gelnamel.

Step 3: Place finger in lamp and rest in groove. Press button. Lamp will turn off after 30 seconds. Apply cleanser to wipe and gently wipe nail.

So after completing the steps exactly how I was supposed to. I found that one coat was nowhere near opaque enough to wear on it's own. So on the rest of the nails I applied 2 coats before doing the final cleanse as the instructions say that you don't need to cleanse between coats. After 2 coats I found the opacity to be a lot better, but if I'm honest it still wasn't completely opaque (which is what annoyed me, because they boast the fact that you only need one coat). I don't mind too much because most nail polish needs 2 coats, but it's the fact it's a lot more time consuming as you're having to do one nail at a time and cure them for 30 seconds each coat. 

Anyway, here's how my nails looked after 2 coats..

Fuse Gelnamel Starter Kit Review

Fuse Gelnamel Starter Kit Review

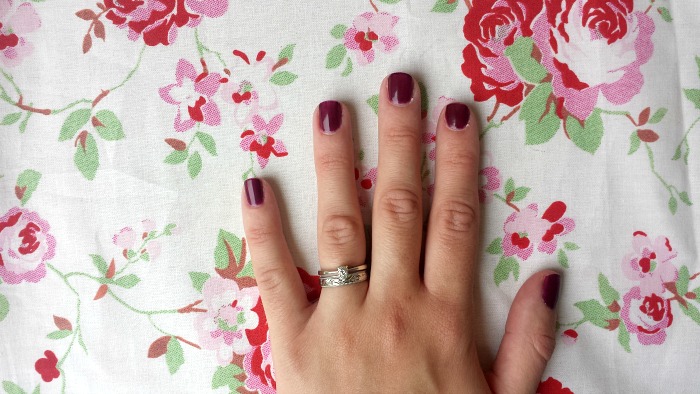
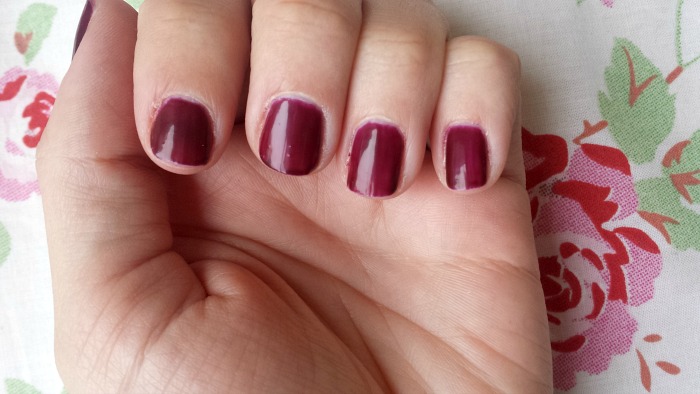
As you can see, they are still slightly transparent, but maybe the coats I applied were a little bit too thin. I'll post an update the next time I play around with it and try the coats a little bit thicker. I did love how shiny my nails looked - a lot shinier than any other regular nail polish I own.

In terms of staying power, I found I had a couple of chips after around 5 days, so not quite as long lasting as they boast, but still better than regular nail polish (on my nails anyway). As with your typical gel manicure, this polish won't budge with your normal nail polish remover. To remove, they advise to slightly buff the nail with the black side of the buffer and soak your nails in warm 100% pure acetone for 5-10 minutes and gently push the polish. Again, slightly time consuming which just wound me up when all I wanted to do was get it off! Yes, I know I'm impatient. It's the price you have to pay to get a gel-like manicure from the comfort of your own home. 

I reckon the more I get the hang of this, the better my nails will look. I do hold out hope for this product and I'm definitely not going to let the removal process put me off. I just need to remember to allow slightly more time when doing it (maybe wait until George has gone to bed, lol).

If you love gel manicures, but want the option to change your shades more often, I'd say to definitely give this kit a go.

Fuse Gelnamel is exclusive to Boots. Starter kits are priced at £35, while individual colours are £15 each.

Are you a fan of at home manicures?

SHARE:

Thursday 8 May 2014

April 2014 Favourites

April Favourites 2014

So April has been and gone, which means it's time for another monthly favourites post. I'm actually considering putting a halt on posting favourites every month as I just think sometimes I am still using the same products from the month before, or I'm trying out fairly new products that don't quite make it to my favourites yet. Anyway, I'll see how I go next month and maybe just post every couple of months or whenever there are a few new products that I can really call my favourites! Ya catch my drift?! Good! Here's what I've been reaching for this month anyway...

The first thing I've been really enjoying using is in fact a cleansing milk (which I always said I hated). It's the La Roche Posay Physiological Cleansing Milk, and it's designed for dry to very dry, sensitive skin (aka mine). I picked this up on a clearance stand in Boots, and because it's La Roche Posay, I put my trust in the fact it wasn't going to break me out. I've been loving using this on lazy mornings just to refresh my skin before toning and moisturising and it feels really nice and soothing on the skin. This product also claims to remove makeup, but I can't vouch for that as I only use it on a morning when my skin has no makeup and just needs a little wake up.

To add a bit of extra glow to my foundation I've been using Soap & Glory's Hocus Focus, and really loving the results. It's marketed as a flaw-softening illuminator which aims to reduce the appearance of pores and illuminate the skin from within. I have found it works best when I mix it in with my foundation as opposed to applying it first, but it gives such a lovely glow to the skin, without looking like a shimmering mess. I do believe they have updated the packaging now as I'd had this one in my drawer for a while before I started using it.

The next product to make the cut is the Elizabeth Arden Ceramide Lash Extending Treatment Mascara. I wrote a review last week (here), in which I raved about how much length it gave my lashes. I should really save it for when I want a more striking look, but I've been reaching for it every day because I just simply cannot resist those lengthy lashes!

I have a couple of nail products in my favourites this month and the first is Essie's Cute as a Button. A beautiful, vibrant coral-pink that is just perfect for the approaching Summer. I love the formula of Essie nail polishes and definitely need some more in my collection! The next is a topcoat that I wish I'd had in my stash years ago. Seche Vite Dry Fast Top Coat has answered all of my non-chipping prayers! I posted a review here so I won't say much more, other than... YOU NEED IT! lol.

So there you have it!
What have you been loving lately?

SHARE:

Friday 2 May 2014

Basic Beauty: Nivea Creme

Nivea Creme

Nivea Creme

Nivea Creme

Nivea Creme

I know what you're thinking, Nivea is just for Grannies isn't it? Well, you just ask yourself why it has been so popular for over 100 years. Why do Nivea still sell 4 pots PER MINUTE worldwide? I think many people don't even consider it these days because of it's 'old' connotations and the fact that it is so cheap! I started using Nivea Creme as a facial moisturiser when I first started to 'properly' look after my skin as a teenager, as that's what my Mam used. As time went by, I began trying different moisturisers, which meant poor old Nivea took a back seat and I ended up forgetting about it. This was until recently when I read an article about how Nivea actually contains 30 of the same ingredients as the world famous (ridiculously overpriced) Creme De La Mer, which retails at £105 for just 30ml. Crazy! Having read that many celebrities swear by this as a must-have moisturiser, I knew I needed it back in my life. 
(I do actually turn to Nivea Soft quite often as a day cream when I don't know what else to buy, so I thought the thicker 'original' Nivea would be perfect to use as a night cream).

Ingredients
Aqua, Paraffinum Liquidum, Cera Microcristallina, Glycerin, Lanolin Alcohol (Eucerit®), Paraffin, Panthenol, Decyl Oleate, Octyldodecanol, Aluminum Stearates, Citric Acid, Magnesium Sulfate, Magnesium Stearate, Parfum, Limonene, Geraniol, Hydroxycitronellal, Linalool, Citronellol, Benzyl Benzoate, Cinnamyl Alcohol.


NIVEA
Image Source: Pinterest


Nivea began selling their unmistakable, trademark blue pots of creme in 1911 and it was marketed as a multi-purpose product to moisturise, soothe, care and repair the face and body for all skin types. This cream has so many uses including treating chapped lips, nappy rash, chillblains and can even be used as a shaving cream. This preservative-free cream with it's signature 'Nivea' fragrance is ultra rich and I can understand that many people (especially those with oilier skin) will find it far too thick for the face. My skin is quite dry/sensitive so I can get away it. 

Since I repurchased this 200ml pot last week, I've been using it as a night cream and have really noticed a massive difference in the suppleness (is that even a word?) of my skin. I'll admit, it is a bit of a nightmare to apply as it is just so thick, but once it warms up a bit it it's much easier to work into the skin. My face does feel quite greasy to the touch and I do look like one big shiny mess for around the first hour, which is why I choose to use it as a night cream. I know that a lot of people will hate using this as a facial moisturiser, but I just absolutely love how thick and luxurious it feels. Even though it's thick, I don't find it clogging in the slightest and haven't experiences any breakouts from using this on a daily basis.

Despite it's unbelievably thick texture and workability, I absolutely LOVE this cream! I'm so glad I've been reunited with this old faithful product, and think it will continue to be my night cream for the foreseeable future.

Nivea comes in a few different sizes and can be purchased near enough everywhere that sells skincare for around £3.50 for 200ml, but Wilko are currently selling it for £2. BARGAIN!!

What do you think of Nivea Creme?

SHARE:
Blogger Template Created by pipdig