A UK Beauty, Lifestyle & Parenting Blog

Wednesday 31 December 2014

Party Perfect Nails with W7!

Festive Party Nails W7

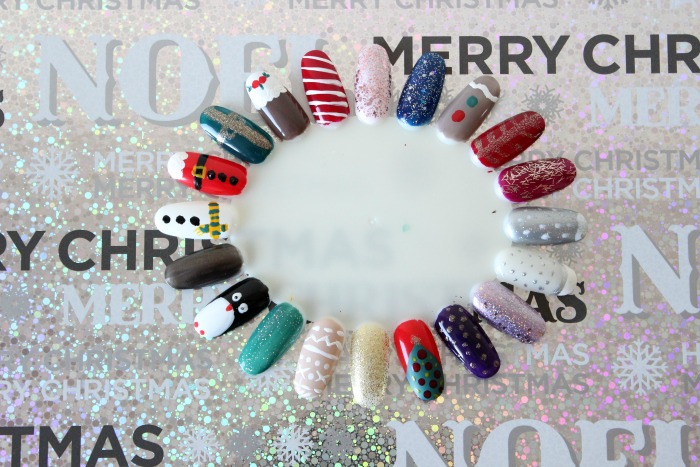
Well party season is well and truly upon us, and that means anything goes when it comes to your nails. It's fully acceptable to wear bright glitters on every nail and I for one love it, even if I don't go out partying! I was very kindly sent some W7 goodies to try and share with you all, and what better day to share them than the party night of the year! I should have probably posted these before Christmas as I think the green would be perfect for Christmas day, but I've been so busy I haven't even had time to organise myself! 

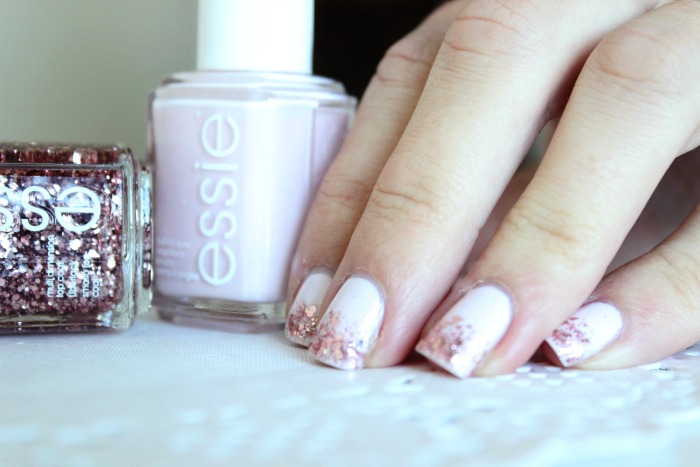
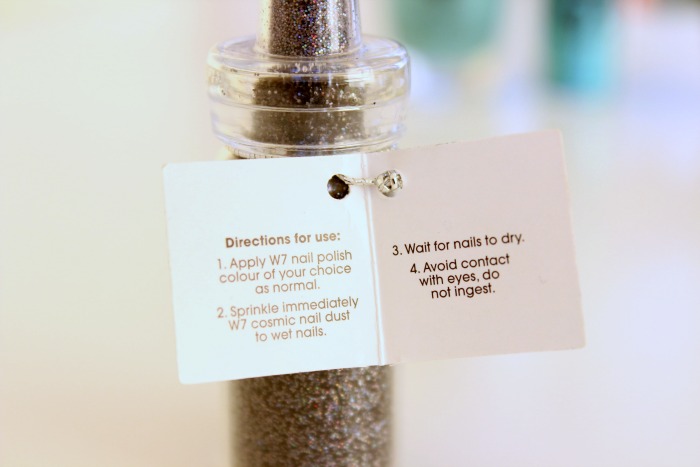
This is the first time I've used a 'nail dust' as opposed to a glitter polish, and I was pleasantly surprised at how great they look and how easy it is to do. You simply paint your nails with your chosen polish, and then immediately sprinkle the nail dust onto the wet nail and leave to dry.

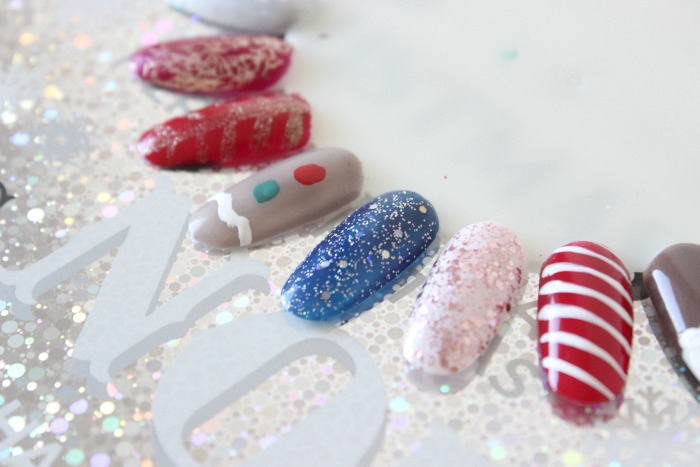
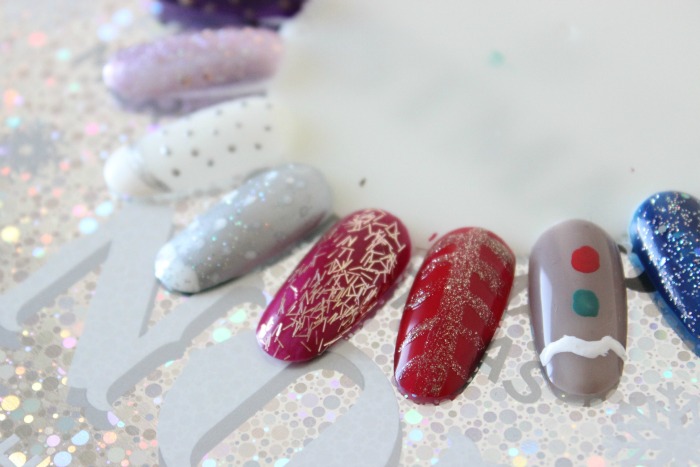
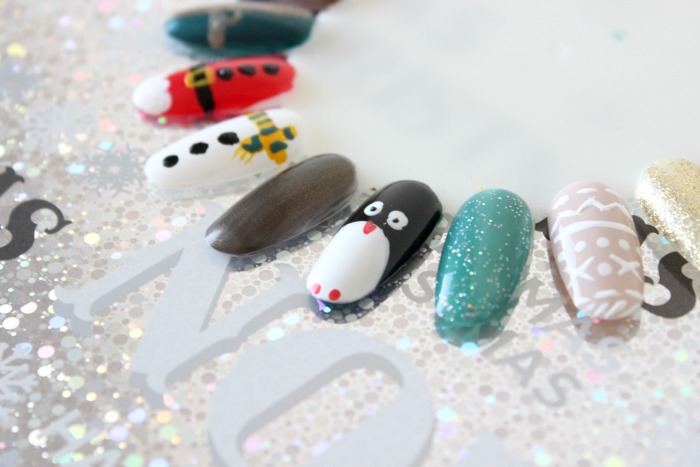
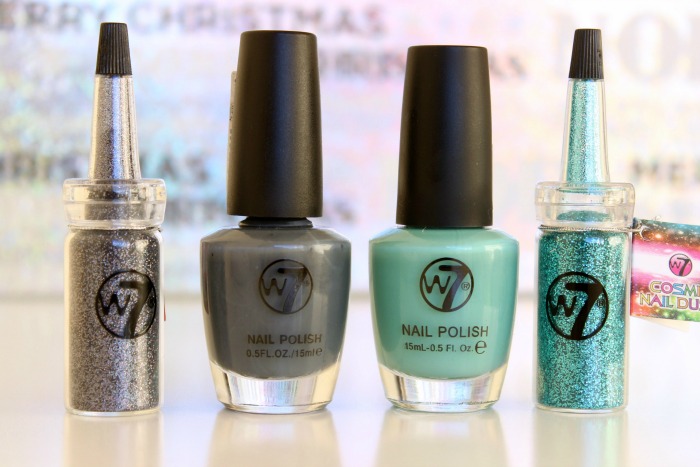
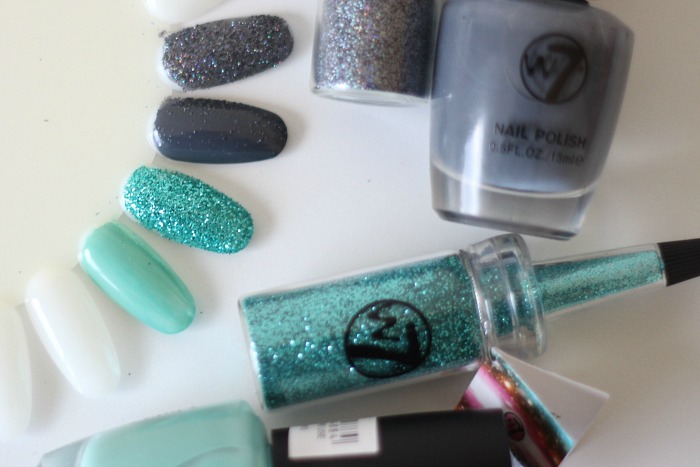
For those who like a subtle, classic party look, the grey option is perfect. Here I used W7 Nail Polish in 145 Slate* and W7 Cosmic Nail Dust in Grey*.

For a brighter, more out there look, there's the green option. I used W7 Nail Polish in 181 Tiffany* and W7 Cosmic Nail Dust in Light Turquoise*.

Festive Party Nails W7 1

Festive Party Nails W7 2

Festive Party Nails W7 3

W7 Nails

What do you think of these? Are you going for a sparkly nail this New Year's Eve?

*Hope you all had a lovely Christmas and All the best for 2015*

post signature
___________________________

Twitter--Bloglovin'--Instagram--Facebook--Pinterest

* = Press Sample
SHARE:

Saturday 27 December 2014

The Fragrance Shop Discovery Club Classics Collection

The Fragrance Shop Discovery Club Classics Collection

Hello oh beautiful ones! Hope you all had a lovely Christmas! I dunno if you'll remember back in October I posted about The Fragrance Shop Discovery Club boxes, and how they do boxes every quarter of the year for £5, in which you receive sample sizes of male and female fragrances, along with money off-vouchers if you fancy going ahead and buying a full size (you can read my post here). Well I'm back again, but this time with the special Classics Collection* box to celebrate their 2nd Birthday. It's a biggy!

The Classics Collection Box* contains a whopping 10 vial samples - 7 female and 3 male. I actually got 4 male ones, and missed out on one of the female fragrances (Givency Very Irresistable), but I can't complain as the box has so many amazing scents to try, plus my Hubby got 2 of the Hugo Boss ones which he loves anyway. Here's what was in my box:

Thierry Mugler Angel
Nina Nina Ricci
Lacoste Touch of Pink
Paco Rabanne Lady Million Eau My Gold
Jean Paul Gaultier Classique
Jimmy Choo Jimmy Choo

Issey Miyake L'Eau D'Issey Pour Homme
Hugo Boss Boss Bottled x 2
Paco Rabanne Invictus


The Fragrance Shop Discovery Club Classics Collection2

The Fragrance Shop Discovery Club Classics Collection5

On top of these, as a Birthday treat, you receive an adorable 7ml size of EsteĆ© Lauder's Modern Muse - which is what I was happiest about as I'd been dying to try it.  Look how cuteeee...

The Fragrance Shop Discovery Club Classics Collection3

The Fragrance Shop Discovery Club Classics Collection4


What do you think of this special box? Would you consider purchasing it?


post signature
___________________________

Twitter--Bloglovin'--Instagram--Facebook--Pinterest

* = Press Sample
SHARE:

Tuesday 23 December 2014

Essie A Sprinkle In Pink Duo

Essie A Sprinkle In Pink Duo

Essie A Sprinkle In Pink 2 Duo

MERRY CHRISTMAS EVE EVE!! Now can we please take a moment out of our busy, hectic Christmassey panics and appreciate the prettiness of this set? Essie's A Sprinkle In Pink comes with Fiji - a very pale pink, and A Cut Above - a Pinky Rose Gold Glitter. I've been wanting Fiji for ages, so when I spotted it with this beautiful glitter how could I say no? A Cut Above is absolutely stunning, and perfect for this time of year, whilst Fiji looks beautiful both on it's own and paired with A Cut Above. In terms of formula, these bad boys are true to Essie style, easy to apply and long lasting. I do find I need 3 coats to make Fiji to look opaque, but I think that's the same with any really pale polish. I love these duo kits, as they retail at £12.99 for 2 full sizes, and when purchased alone these bad boys are £7.99 each. If I'm not mistaken, this was brought out last Christmas as one of their sets, and annoyingly I can't find it online to leave a link - but I did only buy it in my local Boots a few weeks ago so you should definitely still be able to get hold of it.

I decided to go for glitter tips this time which I was really happy with!

Essie A Sprinkle In Pink Duo

Essie a sprinkle in pink duo

What do you think of this duo?
post signature
___________________________

Twitter--Bloglovin'--Instagram--Facebook--Pinterest

* = Press Sample
SHARE:

Sunday 14 December 2014

Urban Decay Naked Palette

Urban Decay Naked Palette Review

Urban Decay Naked Palette

Urban Decay Naked Palette

Urban Decay Naked Palette Review

Urban Decay Naked Palette Review
Urban Decay Naked Palette. £37

The Original, and some might argue, the best! I can't argue the case, as I only own this and the Naked 3, still waiting on Naked 2 (hint hint, Christmas is coming).

Urban Decay are without a doubt, the Monarchs of the eyeshadow world, with their Naked Palettes being probably the most talked about products in beauty blog history. So here I am to talk about the Original Urban Decay Naked Palette, as I know you all can't resist swooning over this beautiful piece of kit again and again - or if you haven't seen this palette before, I'm hoping this post can convince you that you need it in your life!

Cased in a stunning, dark brown, velvet covered cardboard, Naked contains 12 neutral eyeshadows - 2 matte browns and 10 satins/shimmers. Also included in the package is a mini Urban Decay Eyeshadow Primer Potion and a dual ended eyeshadow brush. This palette has received cult status and for very good reason, it's an all rounder. It's perfect for those starting out in eyeshadow, but also great for makeup artists and makeup lovers alike. I've had mine since last Christmas and I couldn't be happier with it. They are the creamiest, most blendable eyeshadows I've ever used and the lasting power is fantastic. They do have quite a bit of fallout, but what can you expect from shimmers when their pigmentation is so incredible? The shades are as follows;

Virgin - a champagne satin
Sin - a light pink shimmer
Naked - a light matte brown
Sidecar - a beige shimmer
Buck - a warm matte brown
Half Baked - a bronzey gold shimmer
Smog - a golden bronze shimmer
Darkhorse - a dark bronze shimmer
Toasted - a taupe bronze shimmer
Hustle - a mocha shimmer
Creep - a blue/black metallic
Gunmetal - a grey metallic

I'd say my favourites have got to be Naked, Sidecar, Buck and Smog, with Virgin being the most beautiful highlight shade there ever was.

Seriously though, how beautiful? Given that they are all pretty warm toned neutrals, it's amazing how versatile this palette is. It can create an unimaginable amount of different looks, from the most dramatic smokey eye to a subtle daytime barely-there work look. There really is something for everyone in this palette, and I'm so happy I have it. Keep your eyes peeled for a review of the ever so talked about Naked 3 Palette very soon...

How much do you love this palette?

post signature
___________________________

Twitter--Bloglovin'--Instagram--Facebook--Pinterest
SHARE:

Friday 12 December 2014

Festive/Party Nail Ideas

Festive Nail Ideas

It's CHRISTMAAAAASSSSSSSSSSSS! So I've been busy practising my nail art and thought I'd share some cute, festive, party nail ideas with you today. I think my favourite has to be the little penguin! I haven't tried any of the designs on my own nails yet but think I need to give my ring finger a penguin as I know George will love it! He has a Penguin soft toy that he's become REALLY attached to and carries him around everywhere, too cute! Hope these inspire you to create some of your own festive nails for the party season! Tweet me or Instagram me a pic as I'd love to see them if
you do!

Festive Nails 2

Festive Nails 4

Festive Nails 3

Festive Nails

Festive Nails1

Which is your favourite?

post signature
___________________________

Twitter--Bloglovin'--Instagram--Facebook--Pinterest

* = Press Sample
SHARE:

Monday 8 December 2014

Proactiv+ Skincare | Introductory Kit

proactiv+ 3 Step System

proactiv+ Skin System

proactiv+ skin system1

proactiv+ skin system2

proactiv+ skin system3

Proactiv+ has arrived in the UK and is kicking up a storm, alongside announcing Nicole Scherzinger as the new face of the brand. Nicole has become a spokesperson for Proactiv+ range, and says after suffering from problematic skin in the past, the core collection has transformed her skin. Nicole says:
"In my teenage years I got a horrible breakout in different places over my face, someone even called me pizza face, so you can imagine my embarrassment. I normally get one monster blemish somewhere that everyone can see, either on my nose or on my chin and I think it was definitely from stress and sweat from dancing and working too hard, but predominantly from stress. I heard about Proactiv+ from my friends. I've been using it for a bit now and have seen a huge difference in my skin! It feels amazing to have a clearer more glowing complexion. It gives me the confidence to wear less make-up. Sometimes I even go out without foundation on. I keep using it because I know I can rely on it".
I'm sure we can all relate to that at some point in our lives, and anything that's good enough for Nicole is certainly good enough for me! I was very kindly sent the Proactiv+ Introductory Teen Kit*  to try and I was so excited to give the whole set a go! I know, I know, I'm far from being a teenager, but the only difference between the Teen Kit* and the Core Kit is the fact that the Teen Kit comes with the cleansing body bar. I don't suffer with blemishes on my body thankfully, but I will still get plenty of use out of this in the shower!

The new and improved Proactiv+ 3 Step System has been specifically developed to deliver more salicylic acid straight to the pores, leaving skin fresh, healthy and blemish-free. Not only do they promise this, they also promise to give a more radiant and glowy complexion, reduce pore size and redness and even out overall skin tone. Suitable for all skin types, the Proactiv+ range has been created to be perfect for women, men and teens who suffer from problematic skin, as well as those who just want to improve skin tone - basically it's aimed at everyone. After using the whole skincare system for a couple of weeks, I now feel I can give my verdict on this skincare when used together.

Step 1: Cleanse - Skin Smoothing Exfoliator
I really like this exfoliator, as it's really light feeling on the skin and the exfoliating beads aren't at all harsh. I usually use this after my normal cleanse as I don't feel it would remove my makeup as well as my other cleansers. After using this, my skin feels soft and smooth and ready for the next step.

Step 2: Treat: Pore Targeting Treatment
This reminds me very much of the ever popular La Roche Posay Effaclar Duo+ in terms of texture and the way it makes my skin feel. It's really lightweight but sinks into the skin like a serum without leaving it greasy or oily. In fact, it contains a lot of the same ingredients, including Benzoyl Peroxide and Glycerin, both of which have anti clogging properties. I really like this, although I don't really have problematic blemishes so I think I could probably live without it.

Step 3: Hydrate: Complexion Perfecting Hydrator
The one that let the kit down for me. Not that it's a horrible moisturiser by any means, but it's just not rich enough for my skin. I actually had to stop using it after a few days because my skin started to suffer. I think this would be perfect for those with oilier skin-types, but if like me you have dry, dehydrated skin then this is just too lightweight.

Bonus Step: Skin Purifying Mask
One I'm still undecided about. Obviously I don't use a mask every night, maybe just once or twice a week when I feel like a good pamper. This mask is white in colour and feels slightly grainy on the skin. What I like about masks generally is the fact they leave the skin feeling so smooth and really pampered, but this one actually leaves my skin quite tight and I literally feel like I need to run to get my moisturiser and oil. I don't know if that's because it purifies the skin and cleans it really well, but I feel it's a little bit too stripping, something my dry skin can't cope well with. I won't say I hate it, because I think there's times when my skin could probably do with a deep clean, and that's when I will turn to this.

Cleansing Body Bar
Cheating here, as I haven't actually opened this yet. I have so many other body products on the go at the moment, and with this being aimed more at teenage skin, I think I'll put off using it for now.


Overall I'm impressed with this kit, the first 2 products I really enjoy and think with my regular moisturiser my skin has really been enjoying it. Have you tried anything from Proactiv+? Do you like the sound of this kit?


post signature
___________________________

Twitter--Bloglovin'--Instagram--Facebook--Pinterest
SHARE:

Saturday 6 December 2014

Stocking Fillers: The eBay Edit

Stocking Fillers The eBay Edit

Gotta love an eBay bargain, especially at this time of year. I'm sharing my top Stocking Fillers with you today, be rude not to really wouldn't it? All clickable links!

15 Piece Nail Art Brush Set - 99p (yes, really)
Tumbling Initial Makeup Bag - £5 (I need one of these)

HAPPY SHOPPING
xxx

post signature
___________________________

Twitter--Bloglovin'--Instagram--Facebook--Pinterest

* = Press Sample
SHARE:

Friday 5 December 2014

Ideal Stocking Fillers From Anatomicals

anatomicals stocking fillers

anatomicals grapefruit bath bar

anatomicals grapefruit bath bar 1

anatomicals puffy the eye bag slayer

anatomicals puffy the eye bag slayer 1
anatomicals world pore 3

anatomicals world pore 3 review

Anatomicals is a brand I've seen popping up all over the place but one I've never tried until recently when I was sent a couple of their products, and one I received in a beauty box. I'm loving the brand and think they'll make perfect stocking fillers, so what better time of year to share them ey?

Anatomicals is pretty hard to get hold of for some reason, but a large selection of the range is available on ASOS and Amazon, making them easy to order for last minute stocking fillers etc. First up is the Anatomicals Soap From Your Favourite Eastenders Bath Bar* (£5.00), a whopping 300g of grapefruity goodness that leaves the skin feeling squeaky clean. but soft at the same time. Next up, one for those who struggle with tiredness and eye bags - the Anatomicals Puffy the Eyebag Slayer Revitalising Eye Mask* (£3.50) is an amazing eye mask that can be used both hot and cold, with the cold being really amazing at reducing those bags by cooling and revitalising the skin around the eyes. I have a feeling I'm gonna be using this a lot more when baby number 2 arrives in Feb/March, eek! Last but not least, there's the Anatomicals World Pore 3 Deep Cleansing Nose, Chin & Forehead Strips* (£7.00). My skin has been behaving really well recently, I dunno if it's a 'pregnancy glow' or just the fact I'm really into my skincare, so I haven't really had the need for these, but I did give them a go and I'm glad to say they didn't break me out, so that's enough for me. My nose is extra sensitive when it comes to these kinds of products, but they simply left my skin feeling ultra clean and fresh, so I know where to turn when I do next get a breakout.

What I love about this brand is the cheeky way they have with words. They really put a lot of effort into their branding and I like that and I definitely wanna try more from the brand. I'm really intrigued to try the Headache Relief Balm & Sleep Balm next so I might just be adding them to my ASOS basket very soon.

Have you tried anything from Anatomicals?


post signature
___________________________

Twitter--Bloglovin'--Instagram--Facebook--Pinterest

* = Press Sample
SHARE:

Wednesday 3 December 2014

SensatioNail Gel Starter Kit

SensatioNail Gel Starter Kit Review

SensatioNail Gel Starter Kit Review2

SensatioNail Gel Starter Kit Review1

SensatioNail Gel Starter Kit Review4

If you've read my blog for some time, you'll know that I'm an avid lover of nails and nail art etc, but being a Mum means I often have to sacrifice having perfect manicures as my nails constantly chip after a day or 2, what with washing up, cleaning, changing nappies and other glamorous motherhood duties. I've had a couple of gel manicures before and must say I did love them, but found the removal process an absolute chore so I've always been put off by getting anymore (plus, as a stay-at-home Mum I definitely can't afford gel manicures at a salon every few weeks). When The SensatioNail Gel Starter Kit in Pink Chiffon* arrived at my door I was keen to see how they compared to that of a salon manicure, but have to admit I was slightly apprehensive about the fact they're a BEAST to remove. Obviously I was still excited to give them a go nonetheless - I'm a sucker for anything I haven't tried!

The Starter Kit contains:

  • Gel Cleanser
  • Gel Primer
  • Gel Base/Top Coat
  • Gel Polish
  • Pro 3060 LED Lamp
  • Manicure Stick
  • Nail Buffer
  • Lint-free Wipes

Along with the Starter Kit, I also got a few extra colours (Midnight Rendezvous*, Disco Fever* & Taupe Tulips*) and the Gel Polish Remover*.

Step one is, obviously to remove any old nail polish, trim and file your nails, push back cuticles and then gently buff the nails with the buffer (this is to make the nail polish stick better I think). Once you're done, the next step is to cleanse the nail with the Gel Cleanser & Wipes to remove any leftover dust, apply the Gel Primer and leave to air dry. 

Next it's time to get down and dirty with the lamp (the best bit, lol). Apply a thin coat of the Gel Base/Top Coat (avoiding the cuticles), lightly cap the nail by running the brush along the open edge and then cure under the lamp for 30 seconds. The lamp is simple to use; it stays on for 1 minute, & beeps after 30 seconds so you know when you're done. I did my four fingers at the same time and my thumb on it's lonesome. Next is to apply the first coat of colour. Apply a thin coat and avoid the sides and cuticles just as you would with normal polish, cap the edge and cure under the lamp for 1 minute. Repeat this step. Finally, add another layer of the Gel Base/Top Coat, curing for 30 seconds. Nails will still feel wet due to the moisture layer, but this is where the final step comes in handy. Simply give the nails another wipe with the gel cleanser to get rid of the moisture layer and VOILA! Sparkly, shiny nails.

The first lot I did I was soo pleased with. I used the shade Taupe Tulips and added some of my Kiss Gel Dress Flowers* on my ring fingers (I do love an accent nail). I couldn't stop looking at my nails, the finish was fantastic and they were so shiny. I was very impressed with the ease of application and the finish, but I've gotta say I was slightly disappointed with the lasting power. Considering they claim to last upto 2 weeks, I expected them to last at least a week. After 4 days my thumb nail chipped at the edge which I could live with as it was only tiny, but then the next day I had 3 fingers that chipped to the point where they needed removing. I dunno, maybe I didn't cap the nails properly. I won't give up on them just yet, and maybe with more practise I'll get them to last that little bit longer. I really had to resist peeling them off as this can seriously damage the nails. Removal wasn't as bad as I thought it would be, but it was still a faff compared to regular nail polish. First I lightly buffed the nail with the buffer and then I soaked a cotton wool ball in the Gel Polish remover and placed it on my nail, using a piece of foil to hold the cotton ball in place. I left them on for around 20 minutes and then gently pushed the polish off the nail using a cuticle pusher. I then cleaned my nails and applied a coat of my trusty OPI Nail Envy just to protect the nail, before deciding on my next mani.

SensatioNail Gel Starter Kit Review5
SensatioNail Taupe Tulips*

The Starter Kit retails at £69.99 and apparently lasts for 10 manicures, however they also do a Deluxe Starter Kit for £110 which contains 2 colours and lasts for 20 manicures, which is currently HALF PRICE in Boots here. Absolute bargain if I'm honest. Would make a lovely Christmas present for any nail lovers. Gel polish colours retail at £15 each and you can top up the essentials with the Essentials Kit for £25.  

Have you tried a SensatioNail Gel Manicure?

post signature
___________________________

Twitter--Bloglovin'--Instagram--Facebook--Pinterest
SHARE:
Blogger Template Created by pipdig